Advertisement
Popular Now


Dead Cells, developed by Motion Twin, is a critically acclaimed roguelike-Metroidvania game that blends fast-paced combat, procedural level design, and permanent progression through a dark, ever-shifting world. Known for its punishing difficulty and rewarding gameplay, it challenges players to navigate a sprawling castle as the Beheaded, a headless warrior who must die, learn, and repeat to conquer its depths. This guide provides comprehensive tips and strategies to help beginners and seasoned players alike survive the brutal biomes, defeat bosses, and unlock the game’s secrets. Whether you’re just starting or aiming to conquer higher Boss Cell difficulties, these tips will enhance your skills and deepen your appreciation for Dead Cells’ intricate mechanics.

1. Master the Basics of Movement and Combat
Understanding Core Mechanics
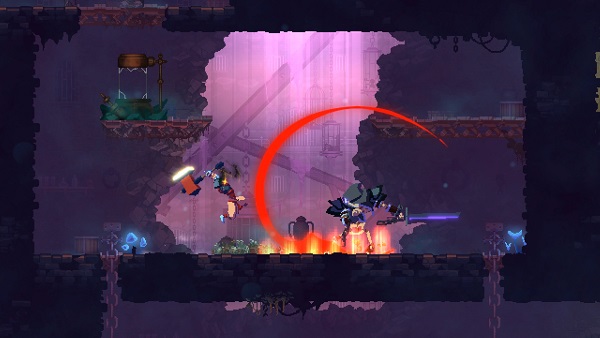
Dead Cells’ combat is fast and unforgiving, requiring players to master movement and timing. The roll ability is your lifeline, offering invincibility frames (iFrames) to dodge enemy attacks, signaled by a yellow exclamation mark above foes. Rolling not only evades damage but also allows you to slip behind enemies for critical hits or bypass groups entirely. Pair this with the ground-slam (down + jump in midair), which stuns enemies when landing from a height, giving you a brief window to attack safely.Prioritizing Mobility
Mobility is key to surviving Dead Cells’ chaotic encounters. Practice combining rolls, jumps, and double jumps to navigate platforms and avoid traps. Rolling through doors stuns nearby enemies, providing an edge when entering new rooms. Avoid rushing into fights blindly; instead, isolate enemies by luring them to open areas where you can maneuver freely. This approach minimizes the risk of being overwhelmed, especially in early biomes like Prisoners’ Quarters. Tips for Movement:- Roll through enemy attacks to avoid damage and reposition.
- Use ground-slams to stun enemies and create attack opportunities.
- Explore slowly to learn enemy patterns and avoid traps.
2. Choose Your Stat Focus Wisely
The Color-Coded System
Dead Cells uses a color-coded stat system—Brutality (Red), Tactics (Purple), and Survival (Green)—to define playstyles. Brutality focuses on fast, melee-based weapons with moderate health; Tactics emphasizes ranged weapons and traps but sacrifices durability; Survival prioritizes high health and heavy-hitting weapons. Early in your run, decide which stat to prioritize and stick to it, as stacking points in one stat maximizes damage output and synergizes with gear affixes.Optimizing Stat Scrolls
Scrolls of Power, found in each biome, boost your stats and increase health. To avoid scaling enemy difficulty too quickly, focus on one stat per run rather than spreading points across all three. For example, a Tactics build with ranged weapons like the Electric Whip or Heavy Crossbow benefits from stacking Purple scrolls to amplify damage. If a scroll offers a choice between two stats, pick the one aligning with your primary build to maintain consistency. Stat-Building Tips:- Choose Brutality for aggressive, close-range play.
- Opt for Tactics for safe, ranged combat with traps.
- Select Survival for tanky builds with high-damage weapons.
3. Leverage Synergistic Gear and Affixes
Understanding Gear Synergy
Weapons and skills in Dead Cells come with affixes that enhance their effectiveness when paired correctly. For instance, combining a weapon with “+100% damage to burning enemies” with an oil grenade or fire-based skill creates devastating combos. Experiment with gear to find synergies, such as pairing Hokuto’s Bow (increases damage taken by marked enemies) with a rapid-fire weapon like the Throwing Knife to maximize damage over time (DoT).Reforging for Better Affixes
Between biomes, visit the Minor Forge to reforge gear affixes for a small gold cost. Prioritize affixes that complement your build, such as poison or bleed effects for DoT-focused setups. Avoid gear with conflicting affixes (e.g., fire and ice) unless your build specifically benefits from both. Synergistic gear can turn a challenging biome into a manageable one, so invest time in optimizing your loadout.4. Prioritize Permanent Upgrades Early
Investing in The Collector
The Collector, found between biomes, allows you to spend cells on permanent upgrades, such as unlocking new weapons, skills, or mutations. Early in your journey, prioritize upgrades like Health Flask (increases potion charges) and Gold Reserves (retains gold after death). These upgrades provide immediate survivability benefits, making each run more forgiving and allowing you to explore further.Unlocking Runes
Runes are permanent abilities that unlock new paths and biomes, such as the Vine Rune (climbing walls) or Challenger Rune (accessing special areas). Focus on defeating Elite enemies in specific biomes, like the Black Bridge for the Challenger Rune, to acquire these early. Runes not only expand exploration options but also increase your chances of finding Scrolls of Power and blueprints, accelerating progression. Early Upgrade Priorities:- Health Flask for more healing opportunities.
- Gold Reserves to retain wealth between runs.
- Random Starter Weapons for varied starting gear.
5. Explore Thoroughly but Efficiently
Balancing Exploration and Speed
While Dead Cells tempts players to rush for Timed Doors (offering cells and gear if reached quickly), thorough exploration often yields better rewards. Search every nook for Scrolls of Power, treasure chests, and secret areas marked by blinking runes on walls. These provide cells, gold, and blueprints critical for long-term progression. However, avoid lingering too long in dangerous biomes like Forgotten Sepulcher, where darkness inflicts damage over time.Navigating Biomes
Each biome has unique enemies, hazards, and rewards. For example, the Promenade of the Condemned offers the Vine Rune but features teleporting enemies, while the Ossuary is packed with high-damage foes but yields more cells. Learn biome layouts and enemy patterns to decide when to explore or push forward. Use the map to track unexplored paths and locate starred enemies carrying valuable items.6. Master the Art of Dodging and Parrying
Perfecting the Dodge Roll
The dodge roll is Dead Cells’ most versatile tool, offering iFrames to avoid attacks and reposition quickly. Practice timing your rolls to coincide with enemy attack telegraphs (yellow exclamation marks). Rolling through enemies places you behind them, ideal for backstabbing or escaping tight spots. Overuse can lead to predictable patterns, so mix rolls with jumps and retreats to keep enemies guessing.Using Shields Effectively
Shields, tied to Survival builds, allow parrying if timed correctly, negating damage and stunning enemies. While less beginner-friendly than dodge rolling, shields like the Rampart Shield (grants temporary invulnerability on parry) can trivialize tough fights. Experiment with shields in safer biomes to master parry timing, especially against bosses like the Concierge, whose telegraphed attacks are easier to counter. Dodging and Parrying Tips:- Roll through attacks rather than away to reposition effectively.
- Practice parrying with shields in low-stakes fights.
- Combine rolls and parries for hybrid defensive strategies.
7. Tackle Cursed Chests Strategically
Weighing Risks and Rewards
Cursed Chests offer powerful gear and scrolls but curse you, causing instant death from a single hit until you kill 10 enemies. In early biomes like Prisoners’ Quarters, open these chests when you’re confident in your dodging skills, as the rewards outweigh the risks. In later biomes or higher Boss Cell difficulties, avoid them unless your build is optimized for no-hit play.Lifting the Curse
To lift a curse, prioritize weak, isolated enemies to rack up kills safely. Use ranged weapons or traps like the Double Crossb-o-wmatic to eliminate foes from a distance, minimizing exposure. Avoid cursed chests in high-density areas or before boss fights, as a single mistake can end your run. The Ygdar Orus Li Ox (YOLO) mutation can save you from a curse-induced death, but it’s a one-time use per run.8. Optimize Boss Fights with Preparation
Learning Boss Patterns
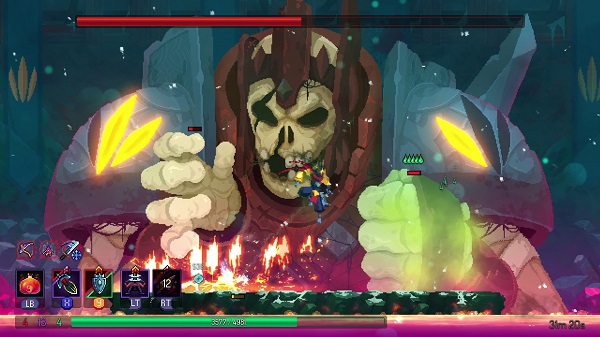
Bosses like the Concierge, Time Keeper, and Hand of the King have distinct attack patterns. Study their telegraphs—such as the Concierge’s ground slam or the Time Keeper’s hook attack—and practice dodging or parrying. Use biomes before bosses to test your build’s damage output and survivability, ensuring you’re equipped with synergistic gear and full health flasks.Building for Bosses
For boss fights, prioritize high-damage weapons and skills that apply DoT effects, like poison or bleed, to chip away at health bars. Mutations like Vengeance (increases damage after taking a hit) or Gastronomy (boosts healing from food) enhance survivability. Avoid entering boss arenas with a curse active, as their aggressive attacks make survival nearly impossible. Boss Fight Strategies:- Equip DoT weapons like Hokuto’s Bow for consistent damage.
- Use traps to control boss movement and create openings.
- Save health flasks for critical moments in the fight.
- 9. Utilize Mutations for Build Enhancement
Choosing Mutations
Mutations are temporary buffs chosen between biomes, tailored to your playstyle. For Brutality, try Frenzy (heals on melee kills) to sustain health in close combat. Tactics players benefit from Support (increases trap damage), while Survival builds shine with Dead Inside (boosts max health). Pick mutations that complement your gear, such as Open Wounds for bleed-focused weapons.Adapting to Biomes
Some mutations are biome-specific. For example, Crow’s Foot (slows enemies on roll) excels in crowded areas like the Toxic Sewers. Experiment with mutations each run to find what suits your playstyle, and reset them at the Collector if they underperform. Avoid stacking conflicting mutations, like healing-focused ones in a glass-cannon Tactics build.10. Progress Through Boss Cells for Greater Challenges
Understanding Boss Cells
Boss Cells (BC) increase game difficulty by adding modifiers like stronger enemies and malaise (a stacking debuff at 4BC+). After beating the Hand of the King, you unlock 1BC, with each subsequent victory unlocking higher difficulties up to 5BC. Focus on filling the Legendary Forge (post-boss) with cells to increase gear quality (+, ++, S), as higher BCs demand optimized builds.Strategies for Higher Difficulties
At higher BCs, prioritize no-hit strategies and maximize DPS to clear enemies quickly. Use Custom Mode to lock in preferred weapons and refine builds, but note that some achievements are disabled in this mode. Routes like Prisoners’ Quarters → Toxic Sewers → Ancient Sewers offer higher cursed chest spawns for scroll boosts but require precise execution. Patience and practice are key to mastering 5BC’s brutal challenges. High BC Tips:- Max out Legendary Forge for better gear quality.
- Use Custom Mode to test specific builds.
- Focus on no-hit play to manage malaise and survive.